Scripted World Editor mod Copyright (c) 2024 Neuromancer
Note: Make sure to download ascii art schematics if it doesn't automatically download. It contains an important dependency for this mod: https://content.minetest.net/packages/Warr1024/aaschems/
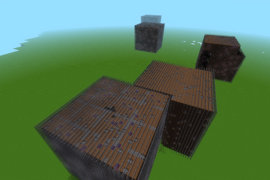
This mod allows the user to create and run scripts that create simple shapes in a sequence.
These shapes can be created out of whatever nodes they want, and between each shape, the the script_runner moves the position to the end of where that shape was finished being created. It works sort of the way the logo language did with a turtle to keep track of your current position. There is also a move command that allows the user to move the position to wherever the user wants before drawing the next shape. Tunnels and voids can be dug by creating shapes using the "air" node.
Usage:
- Create a new mod. e.g. "your_mod_name".
- Create a mod.config that depends on default & scripted_world_editor:
        name = your_mod_name
        title = Your Mod Name
        description = Creates objects in my world
        depends = default, scripted_world_editor
        author = Your Name
- Create an init.lua.
- In init.lua create a script table like the following:
    local script_table = {
        {"fill_box", 3, -10, 3, "Y", "air", "default:mese_post_light", "T", -5},
        {"move", "x", -1},
        {"fill_box", 6, 4, 3, "X", "air", nil, nil, nil},
        {"fill_box", 1, 4, 3, "X", "default:cobble", nil, nil, nil},
        {"fill_box", 10, 4, 3, "X", "air", "default:mese_post_light", "T", 5},
    }
- The first parameter is the CommandName. In the case of the first record "fill_box". Valid values for now are "fill_box" & "move"
- The second parameter X_size is the size of the box in nodes along the x-axis. In this case 3 nodes. Valid values for now are positive and negative integers. Keep them between -500 & 500 mostly.
- The third parameter Y_size is the size of the box in nodes along the y-axis. In this case -10 nodes. This means we are filling the box in a downward direction to a depth of -10 from the start position.
- The fourth parameter Z_size is the size of the box in nodes along the z-axis. In this case 3 nodes. Valid values for now are positive and negative integers. Keep them between -500 & 500 mostly.
- The fifth parm is FillAlongAxis which is used to determine where the pointer position will be at the end of the fill. In this case it's "Y". Valid values are "X", "Y", and "Z".
- The sixth parm is ReplaceWith which is used to determine what nodes the new box will be filled with. In this case it is "air". This means we are opening an empty space. Valid values are any node in default Minetest Game Like "default:cobble". If you need nodes from other mods, let me know and I will add that mod to the optional_depends of this mod so they can be used.
- The seventh parm is PlaceNode which allows you to place one special node anywhere along the length of the FillAlongAxis. In this case it is "default:mese_post_light". Valid values are the same nodes you can use for the ReplaceWith parm.
- The eighth parm is PlaceLocation which is used to determine if you want to place it along the top or the bottom of the shape which is relative to the FillAlongAxis. In this case it is "T" for top. Valid values are "T" and "B"
- The ninth parm is PlacePosition which determines where along the FillAlongAxis the 1 special node will be placed. In this case -5 nodes down. Valid values are integers, typically between 0 and the size parameter for the FillAlongAxis axis.
So to summarize:
- That first fill_box command digs a hole 3x3 wide and 10 nodes deep (Y axis). There is a default:mese_post_light that is placed along the top of the shaft (on the wall) 5 nodes down. The pointer is now at the bottom of the shaft.
- The second command moves back 1 node along the x axis.
- The third command digs a tunnel 6 long, 4 high, and 3 wide. the pointer is now at the end of that tunnel.
- The fourth command creates a cobble wall 1 thick, 4 tall and 3 wide. The pointer is now where the wall was created.
- The fifth command extends the tunnel past the cobble wall for 10 nodes, 4 high, and 3 wide. The pointer is now positioned at the end of that last tunnel.
Note: you can just as easily create buildings, rooms or walls with this mod rather than just digging tunnels.
Next you alter the following to create a script_runner node that when punched will execute the script you defined in your table. The start position is wherever you place the node before you punch it.
In the init.lua register your script_runner nodes like the following example:
minetest.register_node("your_mod_name:script_runner", {
    description = "Script Runner Script 1",
    tiles = {"script_runner.png"},
    groups = {cracky = 3, oddly_breakable_by_hand = 1},
    on_punch = function(pos, node, puncher)
        run_script(pos, script_table)
    end,
})
Place the script_runner node and punch it. It should run your script.
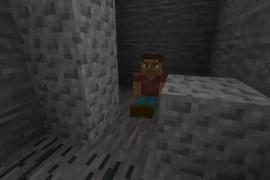
If you want to see an example of it it use check out: https://content.minetest.net/packages/Neuromancer/hero_mines/
Currently Suported Commands:
- move: Move the current location along x, y, or z axis
- fill_box: fills any size box with a specific node type, with special decorations
- build_level: Builds a customized level for Boulder Dig mod based on parms
- place_node: Places an individual node
- move_to_script_start_position: Move the current pointed position to be the position where we started running the script.
- build_schematic: Places a schematic at the current position
- build_ascii_schematic : Places an ascii schematic an the current position
This mod will be a little bit rough to start.
For now, I'm going to be using this mod for creating the levels for the game "H.E.R.O. Test" and "Boulder Dig" and that will keep me busy for a bit. Eventually I will be adding better parameter validation so the mod won't crash if you pass invalid parameters, and hopefully adding shapes like cylinders etc.
Have fun!